How to create an EPiServer NuGet package
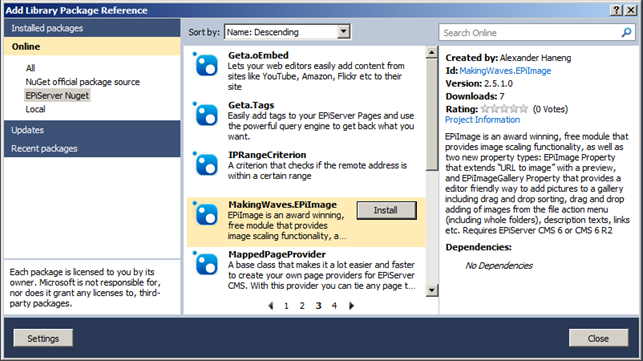
NuGet is the easiest way to add EPiServer modules to your project. Just browse the library and click a button and everything is downloaded and installed for you. Including any changes to web.config and adding references. In this blog post we will look at how you can add your own module to EPiServer’s nuget feed.

Creating the NuGet package file
The first step is to create a NuGet package. More specifically a .nupkg file that contains all your dlls, files and modifications for the module as well as some basic information about the module.
Step 1: Download the NuGet.exe Command Line tool. This is the command line tool that will create the .nupkg file.
Step 2: For nuget.exe to know what you want inside your package you need to create a text file in the .nuspec file format. And this is where I spent a few hours with trial and error before I got it working exactly as I wanted.
In the command line run “nuget spec” where you have the nuget.exe file.
![]()
This will create a file called “Package.nuspec”. Open it in Notepad and edit with the information about your module.
The Package.nuspec file:
<?xml version="1.0"?><package xmlns="http://schemas.microsoft.com/packaging/2010/07/nuspec.xsd"> <metadata> <id>Package</id> <version>1.0</version> <authors>Administrator</authors> <owners>Administrator</owners> <licenseUrl>http://LICENSE_URL_HERE_OR_DELETE_THIS_LINE</licenseUrl> <projectUrl>http://PROJECT_URL_HERE_OR_DELETE_THIS_LINE</projectUrl> <iconUrl>http://ICON_URL_HERE_OR_DELETE_THIS_LINE</iconUrl> <requireLicenseAcceptance>false</requireLicenseAcceptance> <description>Package description</description> <tags>Tag1 Tag2</tags> <dependencies> <dependency id="SampleDependency" version="1.0" /> </dependencies> </metadata></package>
You can have nuget automatically find and add files to your package. But I much prefer specifying what files to add manually as I had a few problems with the automatic method and I want greater control on what to add and not.
The files need to be put in specific folders to end up in the right place when you install the package.
Lib
This is where to add your DLLs. The files in this folder will end up in the bin directory of the project and references will be added to the solution file.
Content
This is where to add your other files. The files in this folder will end up in the root of the solution. So if you want to add a XML lang file add it to content\lang
Here is the nuspec file I use to create the EPiImage package:
<?xml version="1.0"?><package xmlns:xsd="http://www.w3.org/2001/XMLSchema" xmlns:xsi="http://www.w3.org/2001/XMLSchema-instance"> <metadata xmlns="http://schemas.microsoft.com/packaging/2010/07/nuspec.xsd"> <id>MakingWaves.EPiImage</id> <version>2.5.1.0</version> <authors>Alexander Haneng</authors> <owners>Alexander Haneng</owners> <projectUrl>https://www.coderesort.com/p/epicode/wiki/EPiImage</projectUrl> <requireLicenseAcceptance>false</requireLicenseAcceptance> <description>EPiImage is an award winning, free module that provides image scaling... </description> <language>en-US</language> </metadata> <files> <file src="C:\MakingWaves.EPiImage\6.x\bin\MakingWaves.EPiImage.dll" target="lib" /> <file src="C:\MakingWaves.EPiImage\6.x\Lang\*.xml" target="content\lang" /> <file src="C:\MakingWaves.EPiImage\6.x\EPiImage\*.*" target="content\EPiImage" /> <file src="C:\MakingWaves.EPiImage\6.x\EPiImage\**\*.js" target="content\EPiImage" /> <file src="C:\MakingWaves.EPiImage\6.x\EPiImage\**\*.css" target="content\EPiImage" /> <file src="C:\MakingWaves.EPiImage\6.x\EPiImage\**\*.png" target="content\EPiImage" /> <file src="C:\MakingWaves.EPiImage\6.x\EPiImage\**\*.gif" target="content\EPiImage" /> <file src="C:\MakingWaves.EPiImage\6.x\EPiImage\**\*.jpg" target="content\EPiImage" /> <file src="C:\MakingWaves.EPiImage\6.x\EPiImage\**\*.zip" target="content\EPiImage" /> <file src="C:\MakingWaves.EPiImage\6.x\EPiImage\**\*.aspx" target="content\EPiImage" /> <file src="C:\MakingWaves.EPiImage\6.x\EPiImage\**\*.ascx" target="content\EPiImage" /> </files></package>
Step 3: Run nuget.exe with your .nuspec file
Run “nuget pack <NameOfYourNuspecFile>”

Step 4: Check that your package contains everything
Rename the file to .zip and open it. You will now see the contents of the package. Verify that everything was added correctly.
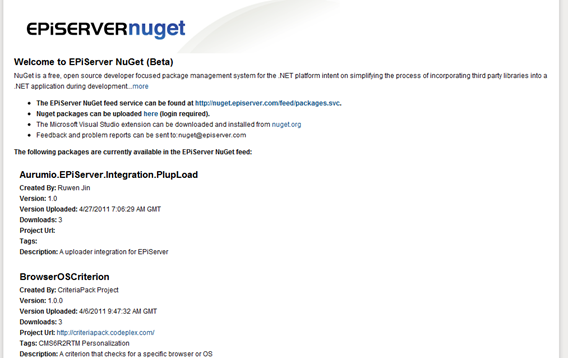
Upload your NuGet package file to nuget.episerver.com
Once your package is ready to go you can upload it here. Use your standard EPiServer World user name and password.
The package will now be tested added to the feed by EPiServer after they have reviewed the submission. Once approved make sure to try to download it and confirm that everything works.

More advanced features
Check out this blog post for how to create more advanced packages. Including modifying web.config, run PowerShell commands etc.
Please note
The feed will show the number of downloads for each package, but if you upload a new version of an existing package the count will start at 0 again. A little bit annoying as it makes it harder to see what packages are popular and not. (Update: This has been added to the backlog for EPiServer nuget. Yay!)
Good luck and I hope to see your module on NuGet soon!
Posted by Alexander Haneng

Comments