Adding custom views to your content
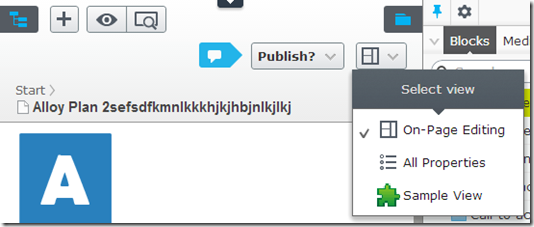
My collegue Duong an Nguyen has already blogged about how to create custom views in EPiServer 7.5 here. But since I’m pretty sure that there are quite a few people that have either not read it or understood the power in this, so here is a recap. This is what we want to achieve, a new view for a given content type:
In EPiServer 7.5, views like “On-Page Editing” and “All Properties” are configured using instances of a class named ViewConfiguration<T> where T is the type you want to add the view for. Let us create a simple view for the content type Product in the Alloy templates:
using System.Web;
using EPiServer.ServiceLocation;
using EPiServer.Shell;
using EPiServer.Templates.Alloy.Models.Pages;
namespace UIExtensions
{
[ServiceConfiguration(typeof(EPiServer.Shell.ViewConfiguration))]
public class SampleView : ViewConfiguration<ProductPage>
{
public SampleView()
{
Key = "sampleView";
Name = "Sample View";
Description = "A simple demo view";
ControllerType = "epi-cms/widget/IFrameController";
ViewType = VirtualPathUtility.ToAbsolute("~/UIExtensions/CustomView.aspx");
IconClass = "customview";
}
}
}
As you can from the code above, there are two parts that defines how the view is loaded:
- ControllerType – Uses a built in JavaScript controller that loads a given view inside an IFrame. It's also responsible for reloading the inner view when the context is changed.
- ViewType – Defines the specifiv view to be loaded, in this case the URL to the page inside the iframe. In my sample, it points to a Web Forms based page, but it could as well be the URL to an MVC controller.
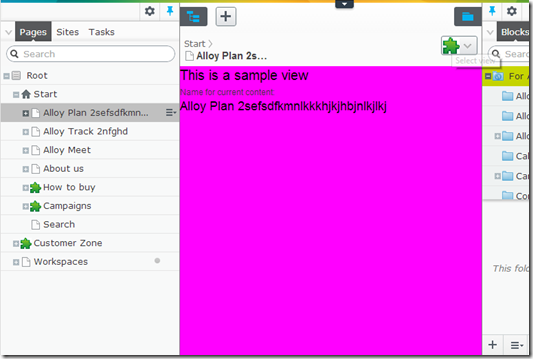
Now let us add the actual view. Since I want to be able to get a reference to the current content, I’ll use the base class ContentWebFormsBase. I create a new web forms view (The sample below does not use a code behind file) saved as “/UIExtensions/CustomView.aspx):
<%@ Page Language="C#" Inherits="EPiServer.Shell.WebForms.ContentWebFormsBase" %>
<asp:Content ContentPlaceHolderID="FullRegion" runat="server">
<style>
body{
background-color: magenta;//Added just to highlight where the view resides
}
</style>
<h1>This is a sample view</h1>
Name for current content: <EPiServer:Property runat="server" PropertyName="PageName" CustomTagName="h2" />
</asp:Content>
Also, I need to add a custom class in the style sheets loaded to the user interface to get my custom icon. In the Alloy templates, there is already a style sheet that is configured to be loaded when the user interface is loaded, so we add a new style to the “/ClientResources/Styles/Styles.css” file:
.Sleek .customview {
background: url('../Images/CustomIconLarge.png') no-repeat;
height: 24px;
width: 24px;
}
We also save a new icon image that is 24x24 pixels to “/ClientResources/Images/CustomIconLarge.png”.
Now we are done. After compiling, the view appears for instances of ProductPage, and when we select it the view is loaded:
Controlling the views
You can also control the views a bit more, for instance which view is the default view as well as disabling views for specific content types. Let us add a UIDesciptor that does two things:
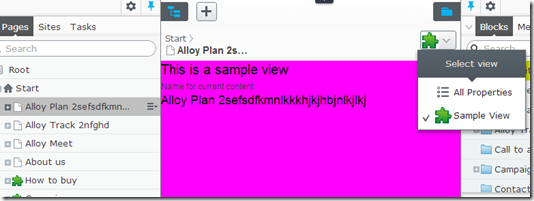
- Sets the default view to our custom view.
- Removes the “On-Page Editing view”.
using EPiServer.Shell;
namespace EPiServer.Templates.Alloy.Business.UIDescriptors
{
[UIDescriptorRegistration]
public class ProductPageUIDescriptor : UIDescriptor<EPiServer.Templates.Alloy.Models.Pages.ProductPage>
{
public ProductPageUIDescriptor()
{
DefaultView = "sampleView";
AddDisabledView(CmsViewNames.OnPageEditView);
}
}
}
When we load an instance of the ProductPage type, we get the following:
With power comes great responsibility
I want to give you a word of advice. Adding new views like this is really powerfull, specifically with the combination of changing the default view. This should, however, be used with much causion. Adding new top level views makes the user interface more complex so it should only be used when the view is considered essential. Also, when adding a third view, the view switcher changes from a single button to a drop down menu, making things a bit more complex for the editors. We hope to be able to introduce the ability to add views to places that are less prominent, for instance in the tools drop down menu, in the future.


Comments