How to setup license for Episerver hosted in Azure
This article describes how to setup and activate the license for Episerver running on a Microsoft Azure web app.
Episerver Cloud license
Episerver running in an Azure web app will require a cloud license. The cloud license works differently than an ordinary license as it is not bound to MAC or IP. Instead the site “calls home” upon activation to register the server. (The server concept in this case is synonymous with a web app instance). As before, the license limits the number of sites and servers (instances) that can be run under that license.
Setup and activation
Let’s assume you have Episerver running in two environments, test and production. The same license file (license.config) should be used and deployed to both environments.
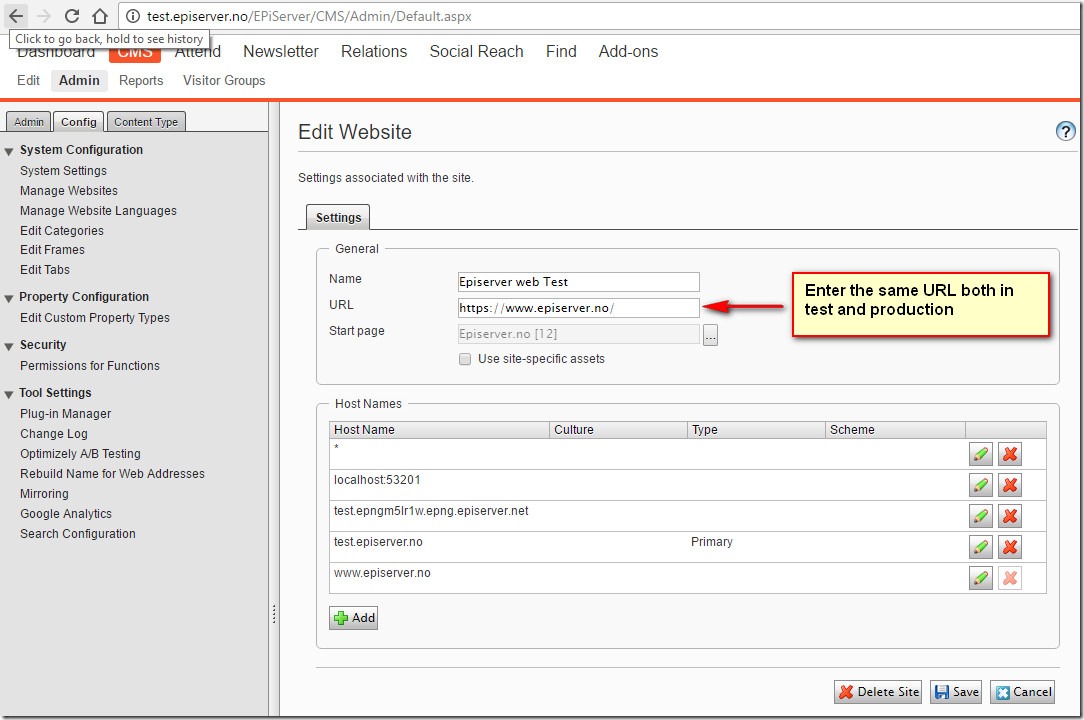
To avoid license error it’s important that you enter the same URL in both the test and production environment. The URL is found in Admin mode > Config > Manage websites > Web sites. (See screen dump below).
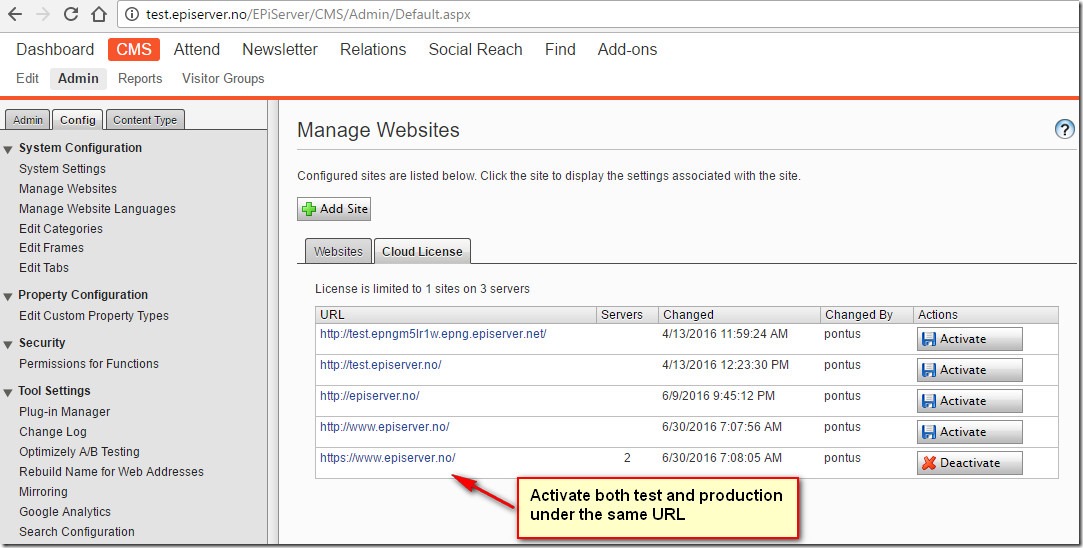
Now it´s time to activate the license. Navigate to admin mode > Config > Manage websites > Cloud license. Activate the license in both test and production with the activate button. (See screen dump below). The servers (azure instances) are counted towards the total number, limited by the license.
You should not activate the other host names, only the one listed that is the same as the main URL.
Since the cloud license is a floating license, you can deactivate instances and activate others as you see fit, as long as you do not exceed the total number of instances allowed by your license. For an example, if you have 3 instances for your production environment, 2 for pre-production and one for test, you can deactivate all non-production instances and use 6 instances in production in case you need to handle an increased amount of traffic for a period.


Comments