The new and improved TinyMCE editor
We have just release version 2.0.0 of the EPiServer.CMS.TinyMce package! This is a major version upgrade so you can expect breaking changes but you should be most excited about the improvements that have been made. I'm going to run through the main changes in this blog post.
TL;DR
The main points are, that we have upgraded to the latest version of TinyMCE (4.7.9 at the time of writing). We have removed the configuration from admin mode and instead the editor is only configurable via code. We have improved the drag and drop experience for pages, blocks and media when using Firefox or Chrome. IE and Edge still work as they have previously. There is currently no support for dynamic content.
New version of TinyMCE
The new editor is using the latest version of TinyMCE (4.7.9 at the time of writing). There have been some really great improvements done to the TinyMCE product and you can read more about them or try their demo editor at https://www.tinymce.com. One point to note is that Episerver only bundles the standard plugins with the editor. So if you have a customer that wants to use a premium plugin they will need to license that from TinyMCE directly.
One of the most noticeable changes in the new version of TinyMCE is the modern theme. The toolbar and icons are much more user friendly and it is even possible to add a menu bar if needed. This is what the editor toolbar looks like in Episerver when using the default configuration:

Configuring the editor
In this release we have completely rewritten the way the editor is configured. It is no longer possible to configure the editor in admin mode, instead all configuration is done via code. We have introduced a new TinyMceSettings class, which can be configured with any setting supported by TinyMCE, and also a TinyMceConfiguration class, which is responsible for mapping settings to properties on page types. Here is an example of how to extend the default settings and also how to configure custom settings for a particular property.
context.Services.Configure<TinyMceConfiguration>(config =>
{
    // Add content CSS to the default settings.
    config.Default()
        .ContentCss("/static/css/editor.css");

    // Limit the block formats for the MainBody property of an ArticlePage.
    config.For<ArticlePage>(t => t.MainBody)
        .BlockFormats("Paragraph=p;Header 1=h1;Header 2=h2;Header 3=h3");
});
You can see the example in its full form here: https://git.io/vxZWE
The TinyMceSettings class contains helper methods for configuring the most common settings. However it is possible to configure any setting supported by TinyMCE by using the AddSetting or RawSettings methods.
Writing a custom plugin
It is also possible to create your own plugins for the TinyMCE editor. See the TinyMCE documentation for how to write a plugin: https://www.tinymce.com/docs/advanced/creating-a-plugin
Once you have created your plugin you can then configure the TinyMCE editor to load it by using the AddExternalPlugin method.
context.Services.Configure<TinyMceConfiguration>(config =>
{
    config.Default()
        .AddExternalPlugin("my-plugin", "/path/to/my/plugin.js");
});
Better drag and drop support
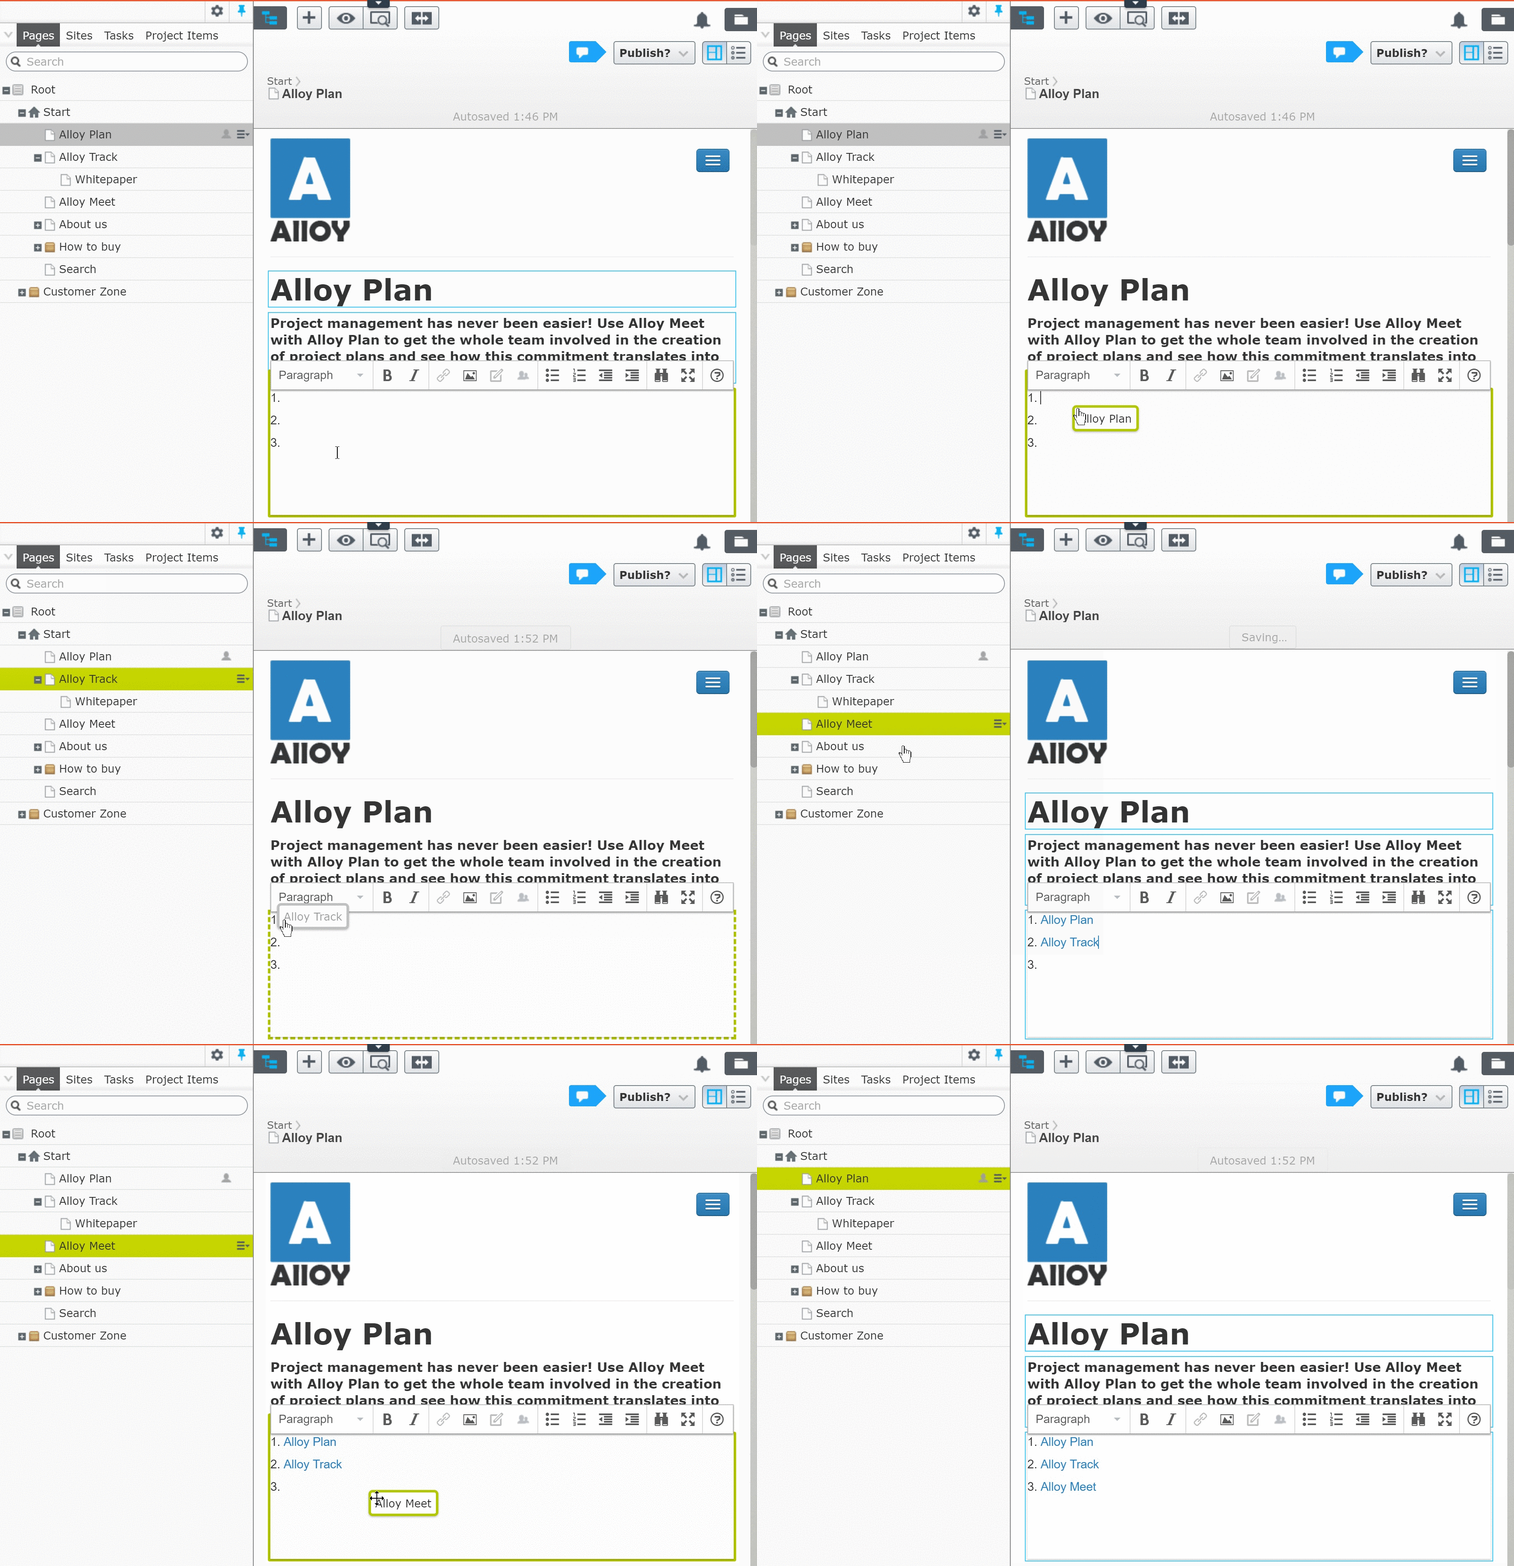
When dragging and dropping pages, blocks, or media in the previous version the TinyMCE editor, it was not possible to target the exact location to drop the content whilst dragging. The content would always be inserted at the place where the caret was last located. Unfortunately, in the new version, this is still the case for IE and Edge due to some browser quirks. However for Firefox and Chrome the experience is much better. The caret will follow the mouse whilst dragging so the user can see exactly where the content will be inserted.

No support for dynamic content
At this point there is no NuGet package for dynamic content that is compatible with the new TinyMCE package. So at this point in time we do not support using dynamic content with the new TinyMCE editor.

Comments